
A service technician does not lose a call because the trike cannot carry the kit. They lose it because the kit is buried under a spare wheel, the fastener bin has tipped over into the cable tray, or the van-trained habit of throwing everything in and digging it out at the kerb turns a four-minute fix into an eleven-minute search. Everything in this guide sits downstream of that decision: a mobile service vehicle is a bay layout problem before it is a motor or battery problem.
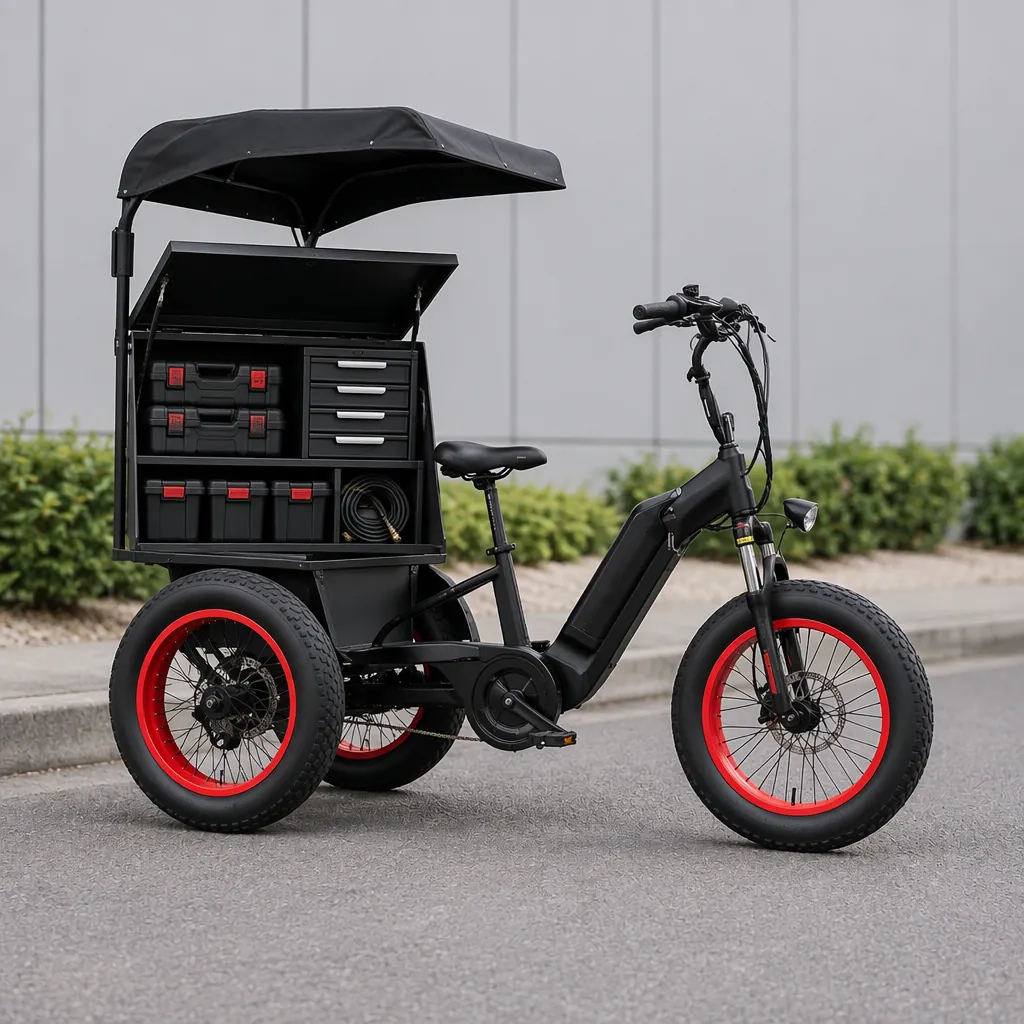
The distinction that matters is audience. General fleet-specification material asks whether a three-wheeled service vehicle can replace a van at all. Bulk buying guides argue about payload and route density. This one starts after that argument is settled, with a platform already on order and a technician standing in the yard wondering where the 10 mm sockets should live. The answer is a layout, a restock cadence and a short list of items that must never be loose under load.
Why a Bay Layout, Not a Van Layout, Is the Starting Point
A van loads from one end. Everything is reachable by stepping in, and depth is free because the operator is standing inside the volume. A cargo box on a three-wheeled platform does not offer that. The box is 150–500 L depending on configuration, it is accessed from the kerb side with both feet on the ground, and the operator never steps into it. Depth therefore becomes a cost rather than an asset: an item 60 cm from the opening is effectively in storage, not in stock.
The practical consequence is that the working volume of a service box is only the front 30–40 cm plus whatever can be pulled out on its own tray. A layout that assumes full-depth access will hold more things and find fewer of them. In practice this shows up as the same technician repeatedly searching, which is the most expensive form of stock loss in a service business: the part is physically on the vehicle, but the job is still delayed.
Two design rules follow, and they are worth fixing before any accessory is quoted. First, the most frequently needed item must be reachable without lifting anything else. Second, anything heavier than about 10 kg must have its own position at floor level, so that retrieving a light item never involves moving a heavy one. Both of these are layout decisions on a drawing, not features bought from a catalogue.
The Three Zones Every Service Box Ends Up With
Across rounds as different as plumbing, pest control, mobile tyre work and mobile wash, the same three-zone structure keeps reappearing, and it is a useful default when a fleet is being specified for the first time.
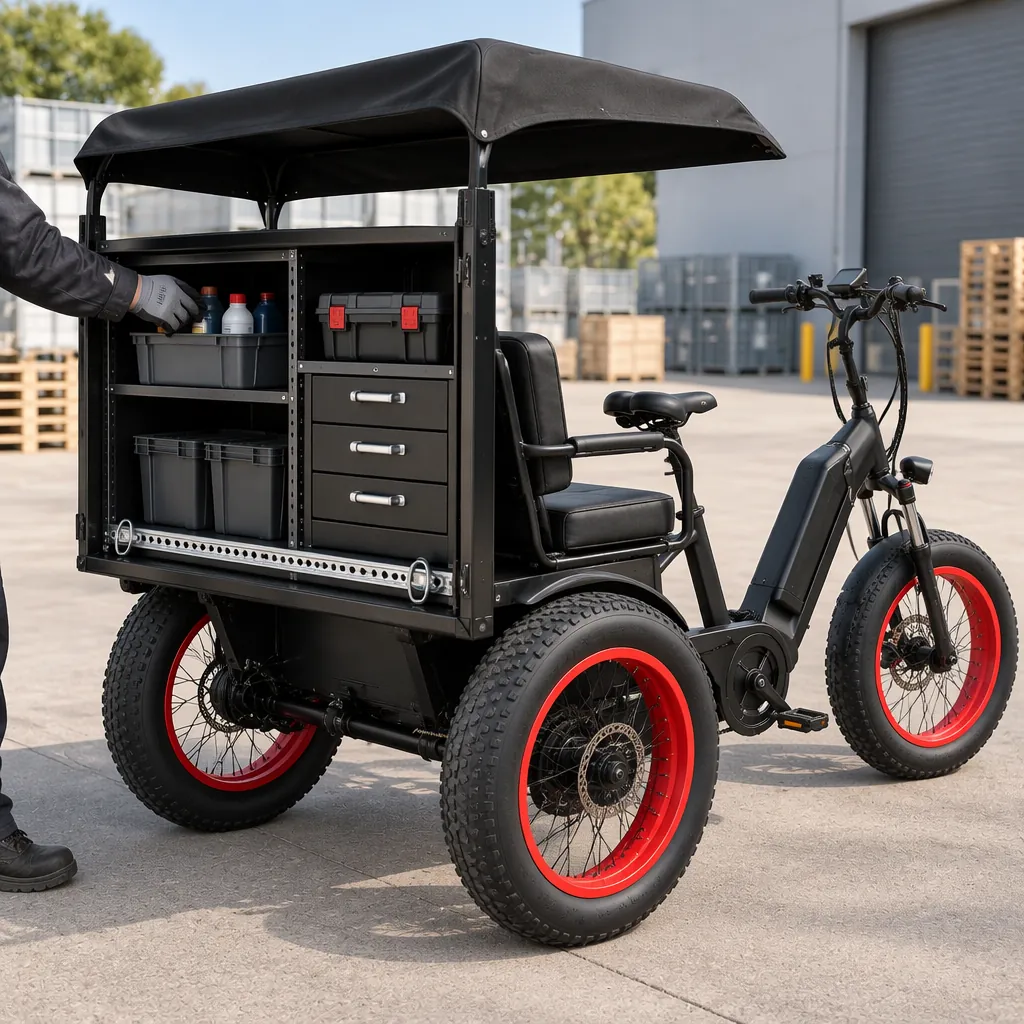
The first zone is the kerb-side front band, roughly 40 cm deep, and it holds what the technician touches at every single stop: the hand tool case for that day's job type, the diagnostic unit, a meter or gauge, gloves, the job sheet or tablet, and a small bin of the two or three fasteners that fail most often. This is the only band that should contain anything loose.
The second zone is the side shelves or stacked trays, and it holds consumables that get used in volume but not at every stop: cable, sealant, tape, cleaning chemical, filters, spare nozzles, zip ties. These are replenished at the depot and drawn down across the round. They should be in containers with a fixed home, because a consumable that has no home migrates into the front band and stays there.
The third zone is floor level at the rear, and it holds the heavy and the rarely used: a replacement assembly, a gas bottle, a coil of hose, a spare wheel where the platform carries one, the jack, and the cleaning supplies. The logic is weight and frequency together. A heavy item that is needed once a day at most belongs here and nowhere else.
The value of naming the three zones is that it converts a vague concern about organisation into a measurable one. The check is a stopwatch: time how long it takes the technician to produce the fifth most common item of the day, starting from the moment the vehicle stops. Under 30 seconds from a structured three-zone layout is a good result. Anything over a minute means the front band has been colonised, and the fix is a container, not a bigger box.
What a 300 kg Platform Actually Carries, in Service Terms
An OEM payload rating is an engineering limit for the chassis, axle group, braking and tyres together, not a working allowance for a service round. The relevant platform figures look generous until they are itemised as a real kit.
| Service kit element | Typical working weight | What it means for the layout |
|---|---|---|
| Hand tool case or two, spares | 15–25 kg | Front band, one case per job type rather than one case for everything |
| Diagnostic unit and gauges | 2–5 kg | Front band, never under another tray |
| Consumables, one round of stock | 20–40 kg | Side shelves, in containers with fixed homes |
| Liquid tank where carried (pump, wash, chemical) | 40–100 kg when full | Floor level, over or ahead of the rear axle, with baffling |
| Replacement assembly or heavy single item | 20–60 kg | Floor level rear, its own position, no stacking |
| Ladder or long stock where applicable | 8–15 kg | Needs an external rack; a ladder inside the box eats the front band |
Add a technician and personal kit and a typical round lands in the 130–230 kg band, which is under the 300 kg EU rating but not by the margin the brochure implies. The two cases that break a layout are long stock and liquids, and both have cheaper solutions than a bigger vehicle. A ladder that rides inside the box displaces roughly 60 cm of the only band the technician can reach from the kerb; that is why an external rack is worth specifying at order time rather than retrofitting.
Liquid load deserves its own warning, because a full tank moves with every corner. A 100 kg tank carried without baffles shifts weight at low speed on exactly the manoeuvres a kerb-to-kerb round is made of. The placement rule is to keep liquid mass at floor level and low in the box, not on a shelf above the tools, and to state the tank capacity in the order so the box floor and tie-down points are specified for it.
The Consumable Restock Arithmetic
Most arguments about vehicle size are really arguments about stock depth, and that is a calculation rather than a preference. A consumable needs a place in the trike's stock plan when two conditions both hold: it is used on at least half the stops, or a round cannot be completed without it.
Consider a technician running ten stops with a common fastener used on four of them, at six pieces per use. That is 24 pieces per round, so a bin of 50 covers two rounds with margin. The same logic applied to a rare part used once a month produces an absurd carrying requirement, which is the signal that the part should not be on the vehicle at all: it should be in a depot stock or delivered on demand. Carrying it costs cargo volume that the frequently used item needs.
A workable rule is to size bins at one and a half rounds of consumption, restock at the end of each shift, and treat anything not drawn in two consecutive weeks as a candidate for removal. Within a month, that discipline cuts the carried consumable weight, which is the one part of the payload a fleet can reduce without changing the vehicle. It also makes the replenishment question answerable: if the bin size is set from measured consumption, a depot can pack a closed restock crate per round instead of requiring the technician to shop for stock each morning.
Items That Cannot Ride Loose: Anchoring, Containment and Pressure
This is the part of the decision that has a safety and a regulatory edge, and it should be settled at order time rather than improvised on a forecourt.
Every heavy item needs its own position with a restraint rated for at least its own mass under braking, not merely a place where it happens to sit. A 60 kg replacement assembly restrained by nothing is a missile at the first emergency stop on a 25–35 km/h platform, which is precisely the speed band where the driver has least time to react. Tie-down points bolted through the box floor, or a dedicated cradle, are the minimum. The field-service fleet guide covers the platform side of this; the layout side is that a restrained heavy item and an accessible heavy item are usually the same design, so there is no trade-off to make.
Pressurised and liquid equipment needs a second layer: containment. A leaking oil container, a swollen gas cylinder or a cracked chemical bottle must not be able to reach the tools. Trays with a lip, bottle cages sized to the cylinder rather than a generic strap, and a drip tray under any liquid storage are cheap at specification and impossible to add cleanly later, because they require the box floor to be drilled after it has been coated.
Loose tools are the quiet version of the same problem. A case that opens in transit scatters the day's kit across the floor of the box, and the technician finds out at the first stop with both feet on the pavement. The mitigation is containment rather than restraint: latching cases, drawer modules with a positive lock, and bins that sit in a frame rather than sliding inside a bigger compartment.
Comparing Kit Carriers: Fixed Shelving, Module Drawers and Zone Packs
There are three broad ways to organise a service box, and the right one depends on whether the fleet is standardised or mixed.
Fixed shelving is the cheapest and the hardest to get wrong once it exists, because shelving can be welded or bolted at the factory to match a measured kit. Its weakness is inflexibility: a change of service line means a new box or an awkward compromise. It suits a fleet running one job type, where the kit is stable across a contract.
Module drawers, meaning a set of stackable, latchable drawer units tied down inside the box, give flexibility at the cost of weight and depth. Each module adds 8–15 kg of empty carcass, and stacked modules reintroduce the depth problem because the third drawer down is behind the first two. These work well when the front band holds one drawer stack and the rest of the volume is open for bulky items.
Zone packs, in which each job type has its own pre-loaded crate that is dropped in for the day, are the best fit for mixed fleets and for operators who rotate technicians between service lines. The crate becomes the unit of issue: packed at the depot, checked in at the end of the shift, and swapped rather than repacked at the kerb. The trade-off is discipline, because a fleet with no packing standard ends up with three quarters of each crate and nothing complete.
Whichever is chosen, three layout rules survive all three approaches. Keep the front 40 cm clear of anything over 10 kg. Give liquids a tray and heavy items a cradle. And leave one compartment that is deliberately empty, because that is where the item bought at short notice will live, and a layout with no slack gets broken by the first exception.
Working the Round: Power, Weather and the Half-Metre Rule
Tools at the kerb need power, and the auxiliary supply is where layouts quietly fail. Running a workshop item from the traction pack is possible on some configurations but changes the range arithmetic, while a separate 12 V auxiliary circuit with its own small battery keeps the traction energy for motion. Either way, the decision affects the layout: an auxiliary battery and its isolator occupy a compartment that must be ventilated, accessible and not shared with liquids.
Weather shapes the layout more than buyers expect. A box that is well organised in dry conditions and unusable in rain needs a work surface under the open lid, and that surface competes with the front band for space. If the fleet operates year-round, the layout should be tested with the canopy or lid in its deployed position, with the technician wearing the gloves the job actually requires.
Then there is the rule worth writing into the specification: nothing that must be used at every stop may sit further than half a metre from the opening. Half a metre is roughly the depth an average adult can reach comfortably while standing at the kerb without leaning into the box. It sounds trivial, and it is the single most reliable predictor of whether a service round gets faster or slower after switching from a van.
Charging discipline closes the loop. Overnight charging suits a one-shift round; a two-shift operation needs either a second vehicle or a mid-day charge window, and the charging dock guide sizes that decision properly. The layout consequence is that the charging port and the front band should not compete for the same space, because a cable routed across the tool drawer is a cable that gets shut in the lid.
What to Put in the Order: Kit List, Restraint Points and Box Options
The order document is where a layout becomes a manufacturable spec, and most accessories are cheaper when named at the start. A practical enquiry for a service-platform cargo tricycle contains four things beyond the vehicle itself:
- The measured kit list with weights, split into the three zones, so the factory can propose shelf and tray positions rather than a generic box.
- The restraint requirement: which items need cradles or tie-down points, and at what mass each is rated.
- The liquid and gas inventory with capacities and container shapes, so trays and bottle cages match real objects.
- The daily consumable list with per-round quantities, which sets bin sizes and the restock crate plan.
The platform terms that apply are the standard ones for this class of vehicle: OEM orders start at 50 units per model, with a 15–30 day lead time on standard builds and 30–45 days for a first custom-branded run, and pre-production samples ship before mass production. The specification decisions that cannot be deferred are the box configuration, the differential and the restraint points; everything else can be adjusted between batches. Our cargo e-tricycle platform page lists the box volumes and payload figures that the layout has to work inside, and the payload capacity guide explains how the rating is derived so that a kit list can be checked against it honestly.
One term is worth negotiating rather than assuming: whether shelf positions and drawer frames are part of the first build or a later retrofit. Factory-fitted shelving is drilled and coated correctly; retrofitted shelving is drilled into a finished box and then touched up by hand. If the fleet is standardised, put the layout in the first order.
The Pilot: Two Weeks of Stopwatch Data
No layout should be rolled out across a fleet on the strength of a drawing. The test is cheap and takes two weeks: run one vehicle, ask the technician to record the time from stopping to first use of the day's primary tool at each stop, and to write down every occasion they had to move something to reach something else.
The two numbers that matter emerge quickly. Median time to first tool tells you whether the front band is right. The count of "had to move something" per round tells you whether the zones are being respected in practice or only on paper. A round that stabilises at a short median and near-zero moves is a layout that can be replicated; one that keeps drifting back toward a single crowded compartment needs a container change, not more training.
Two failure modes are worth watching for. The first is inventory creep, where the technician adds items for a single unusual job and never removes them, gradually filling the deliberate slack compartment. The second is the opposite: a layout so tightly optimised that a genuinely new job type cannot be accommodated, which pushes the technician back to a van for a third of the calls. Both are answered by the same habit, a fortnightly bin audit against the measured kit list, and by treating the empty compartment as reserved rather than available.
For the platform-side questions that come before or alongside this decision, the mobile tyre service guide and the field plumbing guide work through the workshop-in-kilograms and route-time arithmetic for two very different trades, and the pest control guide covers the tank-and-pump version. The after-sales and spare parts guide sets out what the parts supply picture looks like once the fleet is running, and the mobile wash guide shows the water-heavy end of the same layout problem. For fleets being sized for the first time, utility work tricycle OEM covers the work-rated platform specification in full.
If you are specifying a service round and already know the kit weights, send the itemised list with the gaps you care about. Quoting a box layout against a real kit list produces a more useful answer than quoting against a payload figure, because the number that decides the outcome is not how much the vehicle can carry but how quickly the technician can put their hand on the right thing.
Spec a service trike around the kit you actually carry
Tell us the tool weights, the consumables you run each round and the heavy items that need restraint. We will propose a box layout, bin sizes and tie-down positions against the platform figures, not a generic catalogue box.
